Learning how to summarize a YouTube video with AI, or extract a YouTube transcript and process it, pays off whenever you need to turn a long talk into a brief, searchable summary. This guide walks you through building a workflow that extracts a YouTube transcript and summarizes it with AI: drop in any video ID, get back a summary or the raw transcript, and reuse it for research, repurposing, or team handoffs. Build it once, run it forever.
Build a YouTube Transcript Summarizer with AI
You're building a single workflow that takes a YouTube video ID, extracts the transcript, runs it through an LLM to summarize or pull out key points, and optionally saves the result. Run it on any video whenever you need it; your team can use the same workflow from chat or API.
Why bother? Useful for market research when you need to process many videos quickly, finding specific mentions across content, turning lectures or webinars into shareable summaries, or keeping a searchable archive. Once it's built, you're not repeating manual copy-paste. You're one click or one API call away. We'll build it step by step in Aisle using Supadata for transcript extraction.
What you need:
- Aisle account
- Supadata API key (get one here)
- 10 minutes
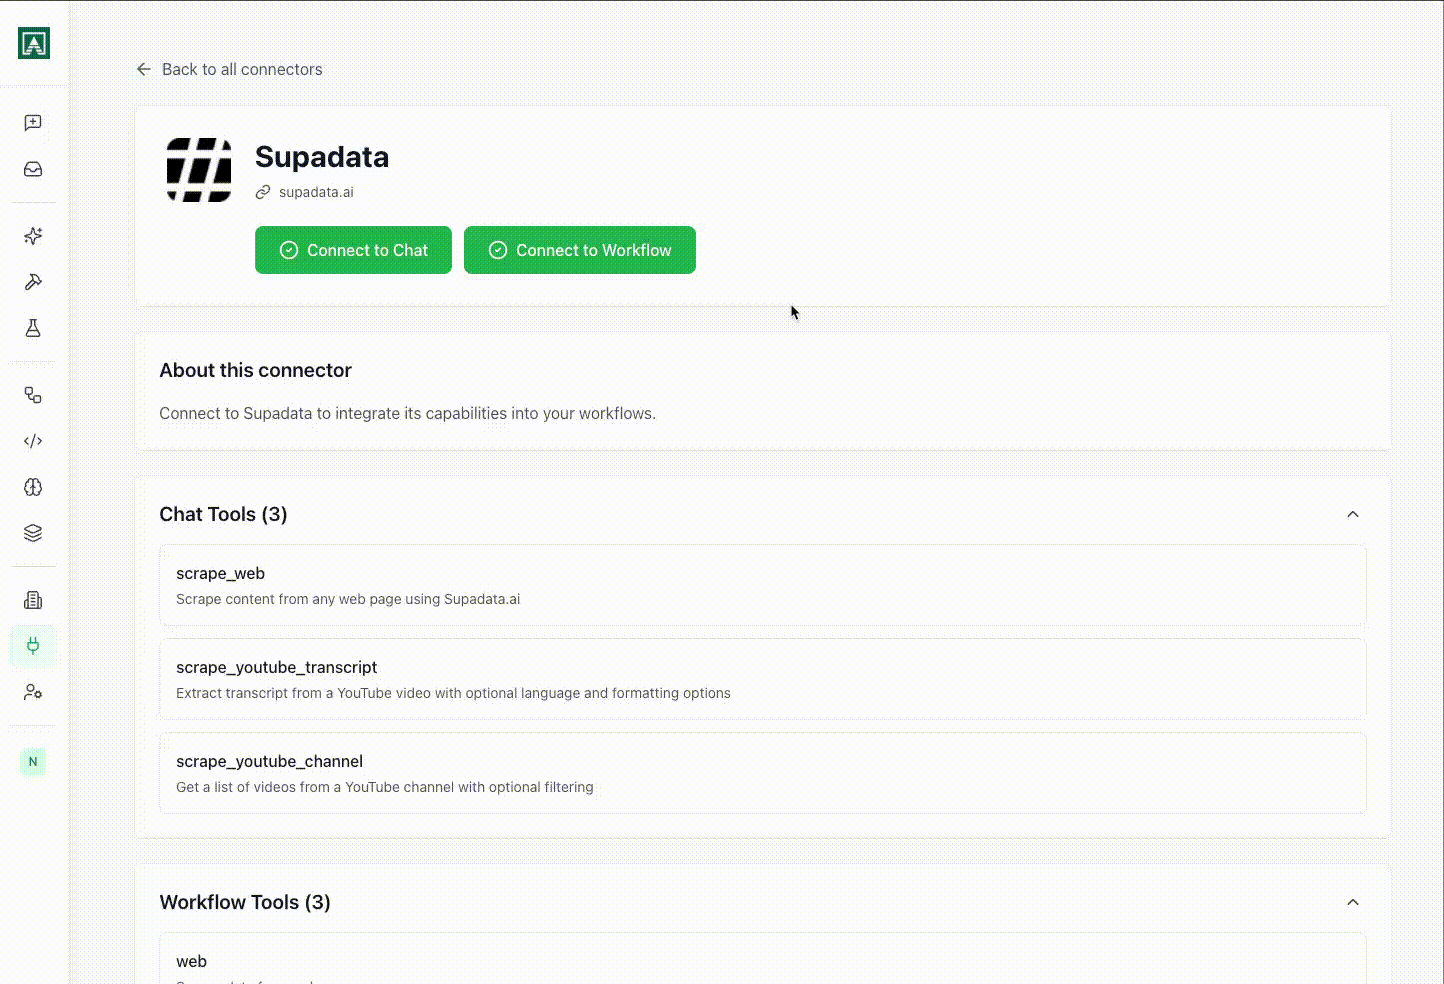
Connect Supadata
Go to Connectors in your Aisle workspace. Scroll down to find Supadata and click Connect. You'll need a Supadata API key. If you don't have one, sign up here and grab your key from their dashboard.
Once connected, Supadata makes several tools available as workflow nodes:
- Scrape webpage content
- Get YouTube video transcripts
- Pull all videos from a YouTube channel
Many integrations in Aisle work this way: connect once, get access to multiple tools you can use across different workflows.
Create a New Workflow
Go to Workflows and click New Workflow. Name it something descriptive: "YouTube Transcript Summarizer" works.
Workflows in Aisle are how you chain multiple prompts or nodes into a reusable flow. Workflows can be shared with your team via chat, run on a schedule, or even triggered by API or external webhooks.
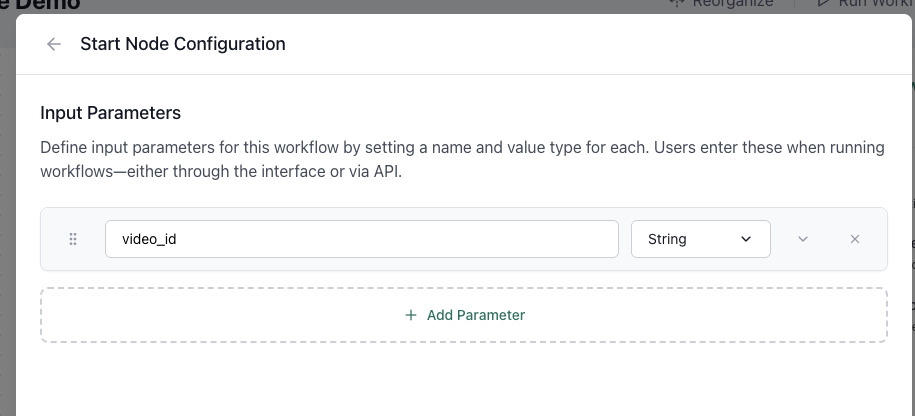
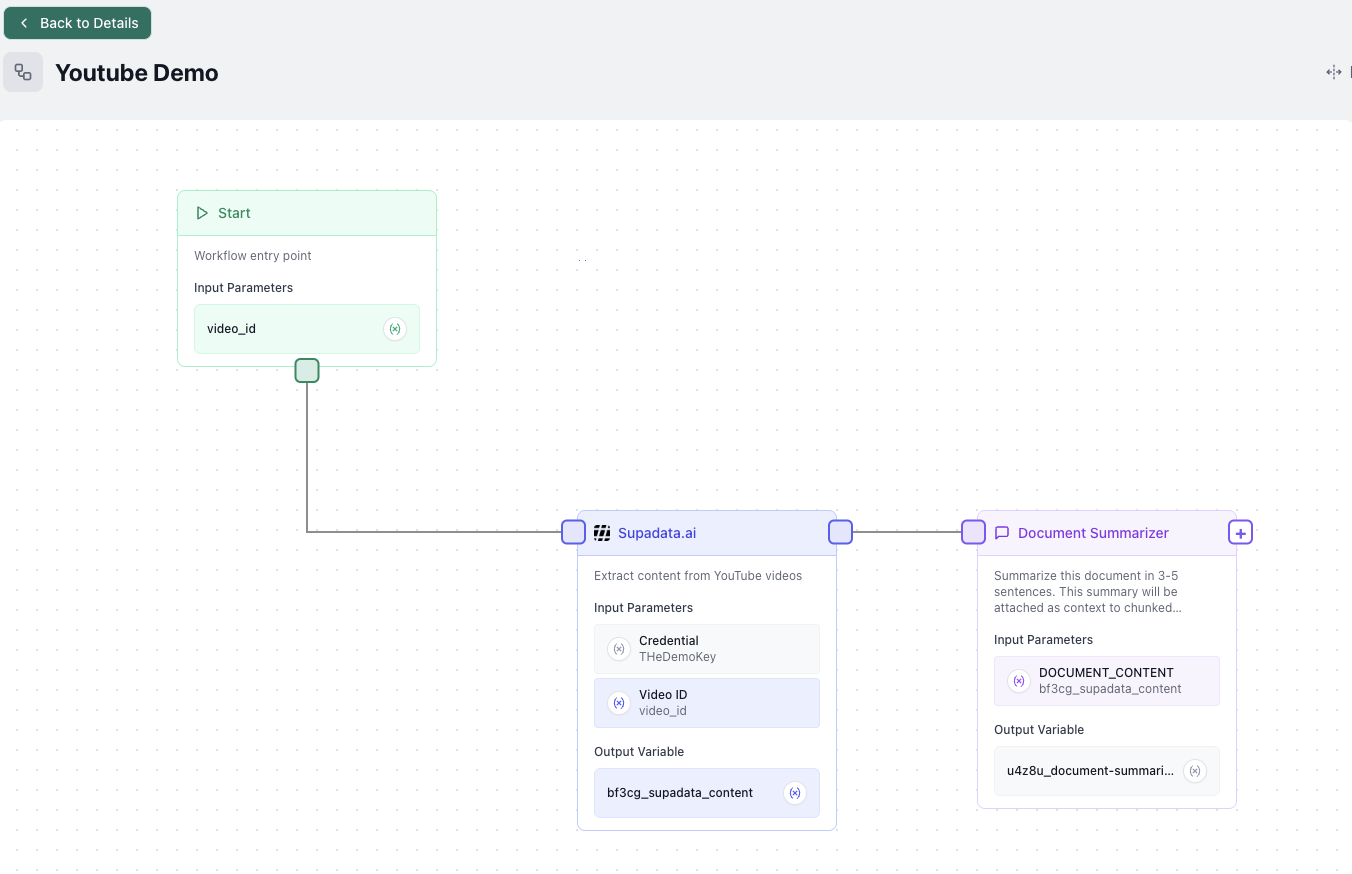
You'll see a blank workflow canvas with a Start node already there. The Start node is important: whatever inputs you define here become the parameters people provide when they run it.
Here, I make a video_id input so we can pass the video to scrape with a default for when users forget:
- Name: video_id
- Type: Text
- Default value: (Optional) Paste a YouTube video ID here for testing
Add the Supadata Node
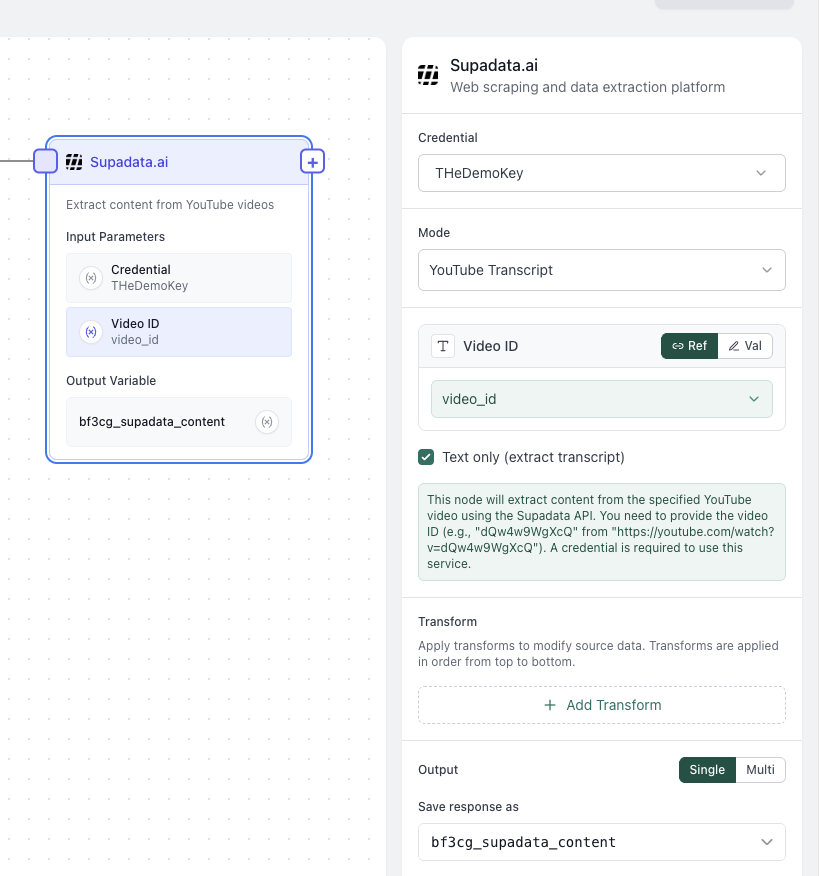
Click the + button below the Start node. Search for "Supadata" in the node library. Select "Get YouTube Transcript" from the Supadata tools.
The node appears on your canvas. Click it to open the configuration panel.
You'll see two fields:
- API Key: Select the Supadata connection you just created
- Video ID: Set this to be a reference variable, and select the
video_idwe defined earlier
Each node in a workflow is a discrete step. Nodes can reference outputs from previous nodes (reference variables), which is how you chain operations together.
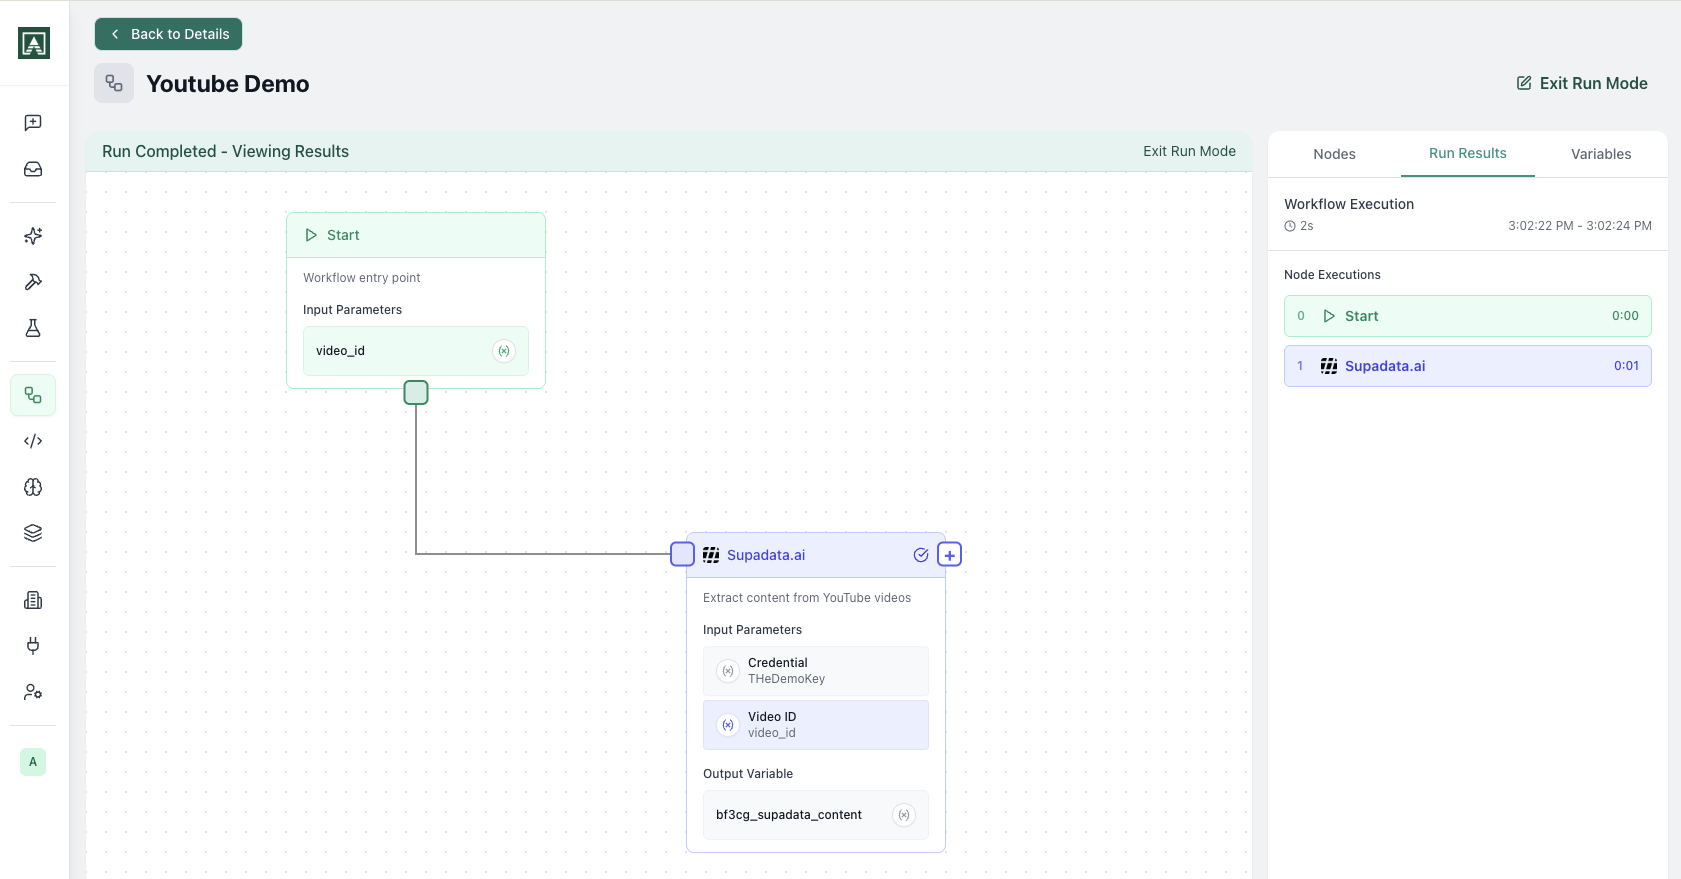
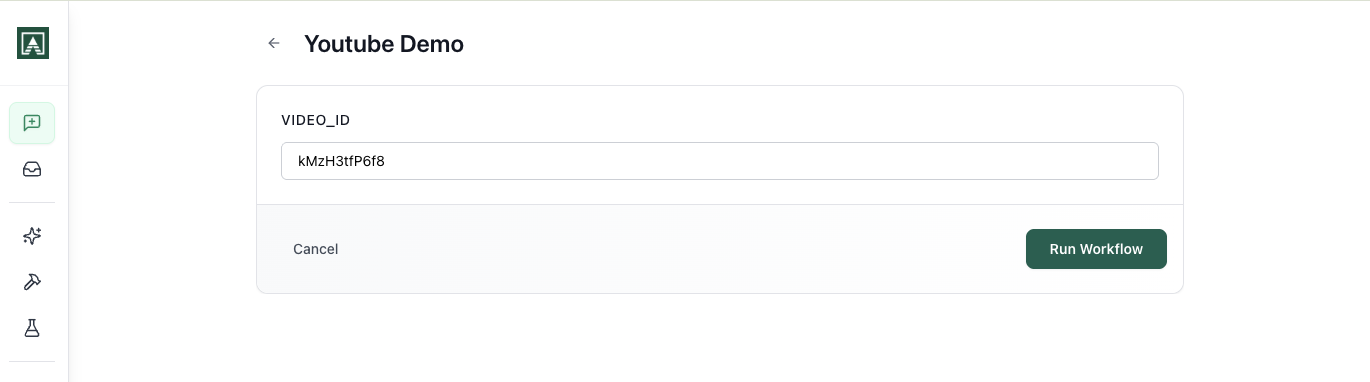
Test the Workflow
When building workflows I typically use the Run mode for testing. Click Run Workflow in the top right. Here you can watch the nodes run in sequence and validate the output and workflow operate as expected.
Testing as you build is important. Each time you add a node, run the workflow to make sure it works before adding the next step. This makes debugging much easier than building the whole thing and testing at the end.
Options From Here
Now we have the transcript. There are a lot of options. We might use the memory feature to create a new document/context to be used in other workflows and prompts later.
Or we might add a follow-on Prompt node that summarizes the transcript from a point of view or looks for mentions. This is then a useful tool for our team.
What to do with your transcript
Once you have the transcript, a few directions:
- Summarize by topic or speaker. Long calls become scannable in seconds.
- Extract specific mentions. Find every time a competitor or topic comes up, useful for research.
- Pull quotes for repurposing. Blog posts, social clips, internal briefs.
- Batch multiple videos. Run on a schedule to keep a running archive of competitor or industry talks.
Deploy to Chat
This is where workflows become really sticky: Aisle makes it easy to distribute your Prompts and Workflows in multiple ways.
Go to Entry Points in your workflow settings. Entry points are how you make workflows available. You can deploy the same workflow in multiple ways:
- Chat: Team members run it as a command in Aisle chat
- API: Call it from external systems
- Schedule: Run it automatically on a schedule
- Webhook: Trigger it from external events (i.e. Gmail received, Slack message)
We're setting up a chat entry point.
To add a Chat Entry Point: Click Add Entry Point → Chat.
Configure:
- Name: Something your team will recognize, like "Summarize YouTube Video"
- Who can access: Choose who on your team can run this (just you, specific people, or everyone)
- Follow-up behavior: This defines what happens after the workflow runs and returns results to chat. You can either:
- Run the workflow again (if someone provides another video)
- Switch to conversational mode with a model (so they can ask follow-up questions about the summary)
Using It in Chat
Now you and your team can run this workflow directly from chat. On the chat launcher, just search for our workflow. You will notice users see a form to fill out the video_id. What we have done here is build a useful tool that then was no effort to deploy to our team.
The same workflow could also be deployed as an API endpoint, run on a schedule, or triggered by a webhook, without changing any of the workflow logic.